

Kym Eaton
Posted on 3rd July 2023
If you have a long list of products, PowerEPOS can bulk upload PLUs using the Product Import Wizard. This useful tool also allows for bulk import of PLU prices, including sales modifiers and prices schemes, and POS users.
In this guide, you will learn how to upload many PLU's at once to get your POS set up as efficiently as possible.
In this guide you will learn how to:
- Prepare your CSV file
- Select the CSV file to import
- Match fields
- Check for upload errors
- Check if the import is successful
- Publish PLUs to the POS
Prepare your .CSV file
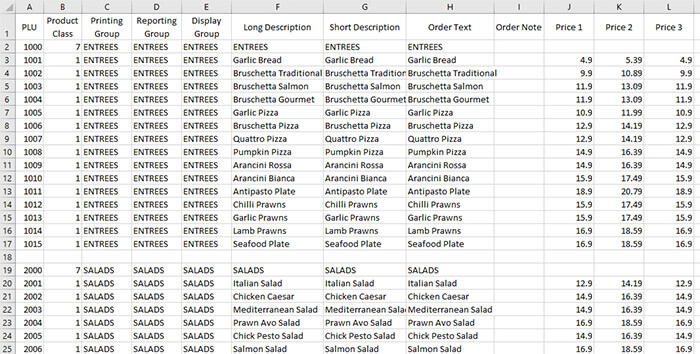
1. Prepare your file in Excel or another spreadsheet program and save it as a .csv file. You can either prepare your own file from scratch or download and populate our sample CSV.
Select your .CSV file to import
1. From the PowerEPOS Management Console, select the Import Wizard tile.
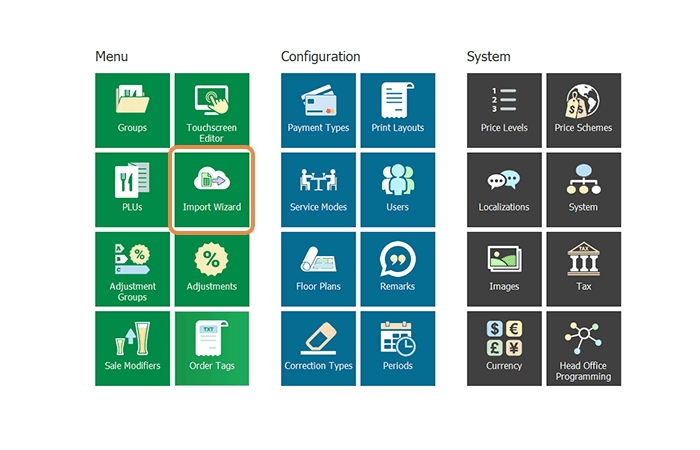
2. This will open the Product Import Wizard where we are presented with 3 options, Import PLUs, Import PLU prices and Import POS users. Each tab provides related information.
The Import PLU tab provides information on import fields and WaiterPOS export formats accepted by PowerEPOS.
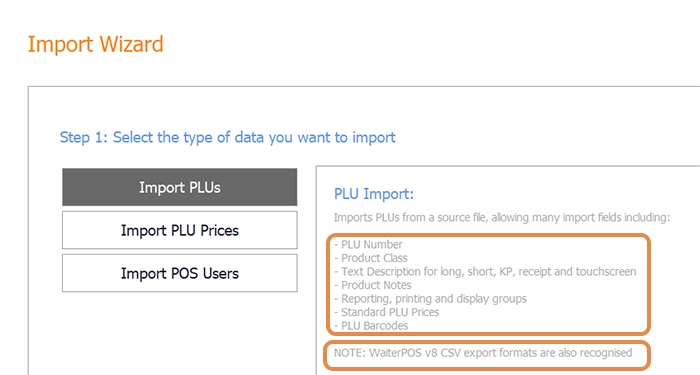
3. In our example, we will conduct a PLU import so we select the Import PLUs button then we hit next in the Contol Panel.

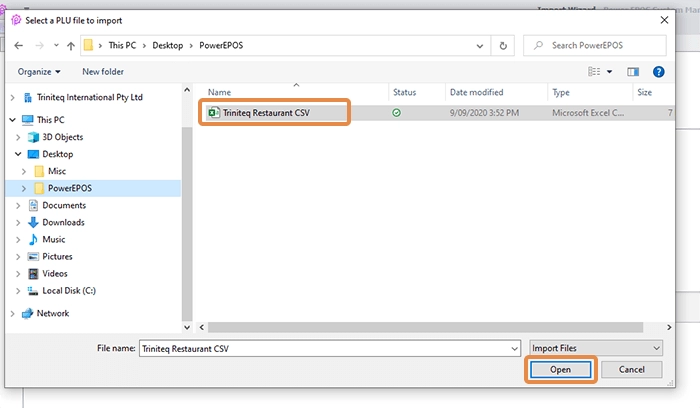
4. Locate and open the .CSV file to import it from your PC.
Matching Fields
1. Now we must match the fields from our .CSV file with the fields in PowerEPOS. You will notice that PowerEPOS has already matched the fields for us so we select Proceed.
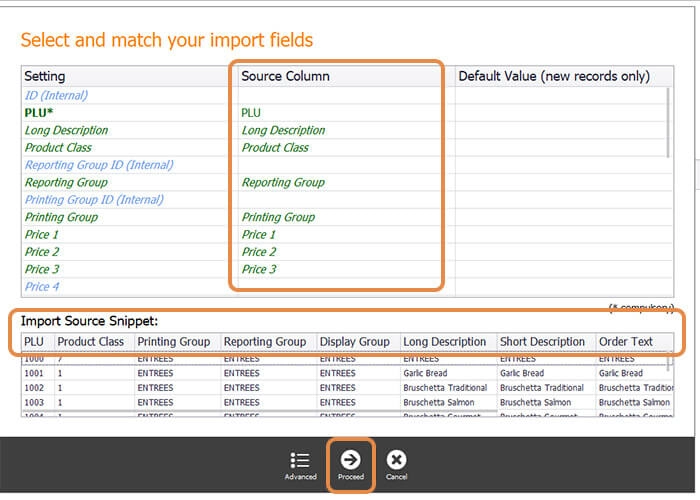
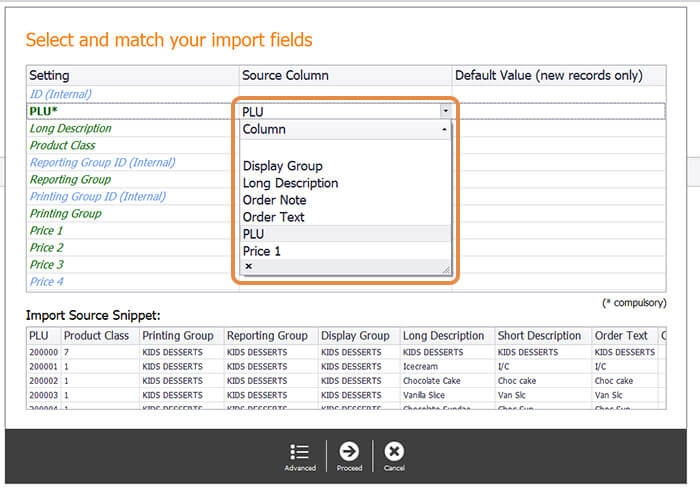
If we needed to match a field manually, we would use the drop-down on the right side of each source column field to select the correct field name.
Check for upload errors
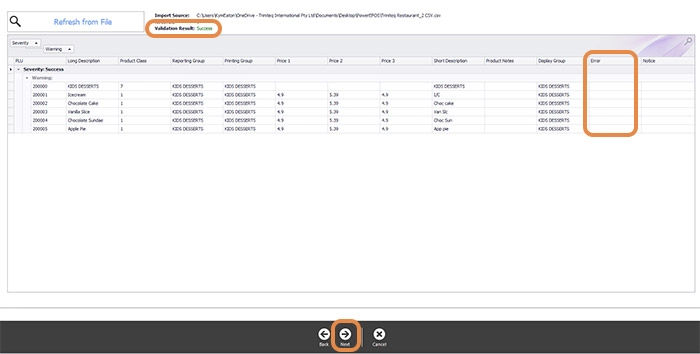
1. This screen allows us to check for errors. We'll check the Validation Result which is a success and under the Errors column, there are no errors listed which means our PLUs are correctly mapped, and we click Next. If we did find a mapping error we would select Back to fix it in the previous screen.
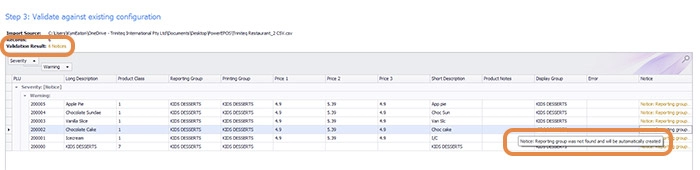
2. Next we validate the data against the current PowerEPOS configuration. In this screen, we are presented with 6 Notices which, when hovered over tell us that the reporting group Kids Deserts does not exist, but will be created from this import. Then we click Next, to move to the next screen.
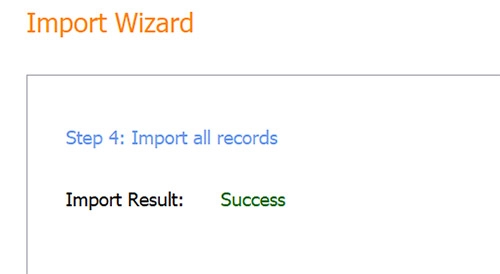
Check if the import is successful
1. Once the import is complete we receive the Import Result and, as our import was a success, we click Finish which brings us back to the Management Console.
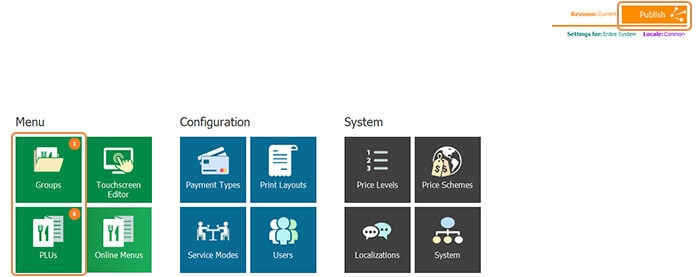
Publish our PLUs to the POS
Now we must publish our imported PLUs to our POS terminals. In the Management Console, we can see that there are 6 new PLUs to publish and 1 new Group which was created during our import.
1. From the Management Console, we move up and select the Publish button top right on the screen.
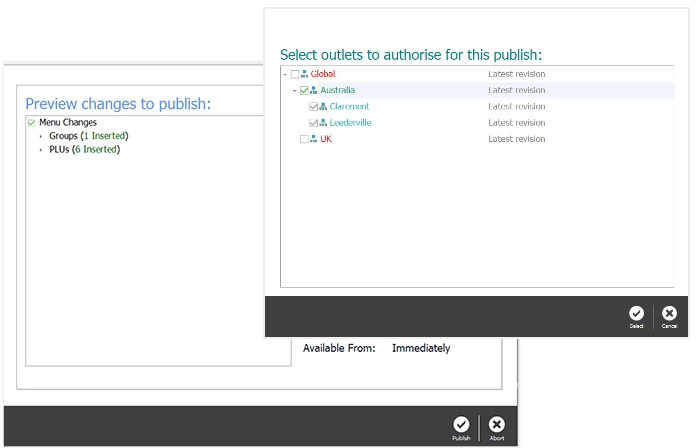
2. We then select the items we want to publish and the outlets we want to publish to.
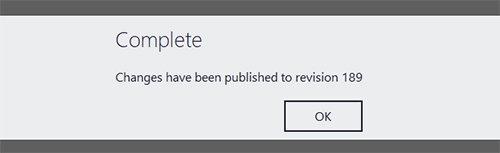
3. Once our changes have been published we receive the Complete message with the revision number that can be used in the Revision Management Tool, to wind back changes if necessary.
Download the Product Import Wizard Guide
Still got questions?
Just submit them to us at Triniteq Support .