
Kym Eaton
Posted on 3rd July 2023
Seamless communication between your POS and production areas is key to the smooth running of your venue or outlet.
Triniteq’s PowerEPOS provides Printer Roles for additional flexibility when mapping PLUs to production area and receipt printers. This brilliant feature allows us to effortlessly add new printers to our POS system, or work around faulty printers with just a few button-clicks, removing the stress from potentially problematic situations.
Printer Roles save time by allowing us to quickly change the printer that PLUs are printing to. If our printer should experience an issue, or when adding new printers, we use printer roles to avoid having to individually reassign each PLU to the new printer. By using Printer Roles, PLUs need only be assigned to a Printer Role once, then the printer role can be easily moved between physical printers as required.
Learning Areas
 Create a new printer role Connect and disconnect printer roles from physical printers Move a printer role to a new printer Publish printer role settings to the POS
Create a New Printer Role
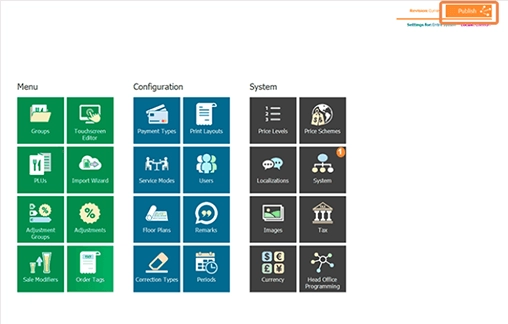
1. From the PowerEPOS Management Console, select the System tile.
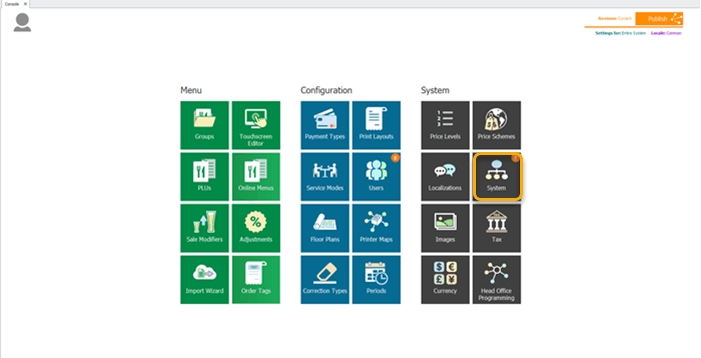
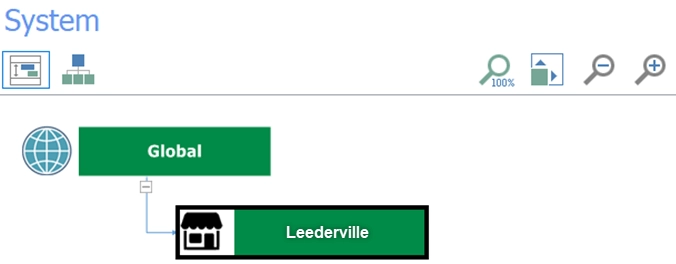
2. This will open the System Module where we have access to the Global Configuration Settings for our system. The outlets on the left-hand side are indicated by a shop icon.
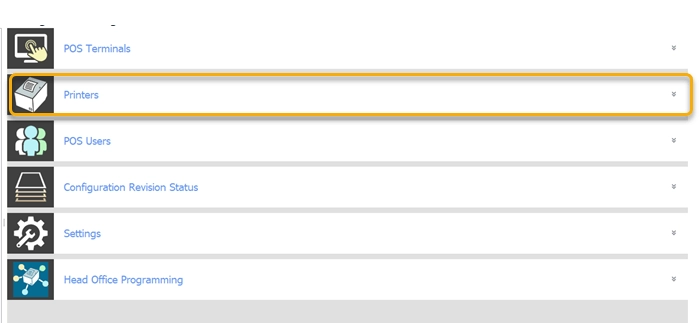
In our example, by clicking on the Leederville Outlet on the left-hand side, we can open the settings for the POS Terminals.
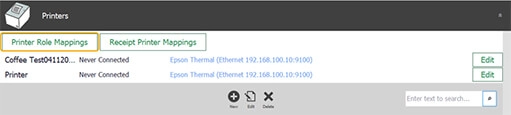
3. From here we will select Printers on the right-hand side from the available settings listed. This will open the Printer Configuration Window which lists printers already set up for the outlet.
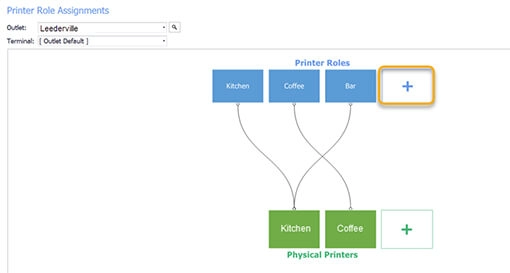
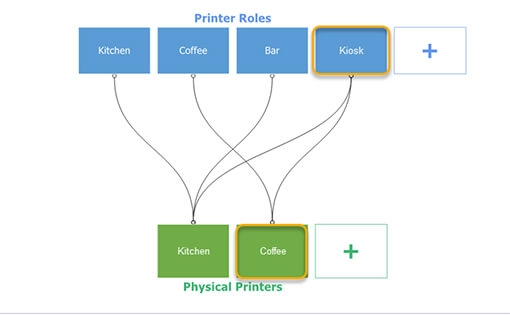
4. This allows us to then hit the Printer Role Mappings button to open the Printer Role Assignment window. Printer Role assignments show the relationship between the printer role and the physical printer, allowing us to easily change the printer roles to physical printers if needed.
In our example, all products with PLUs assigned to the Coffee printer role will be printed at the physical printer called Coffee.
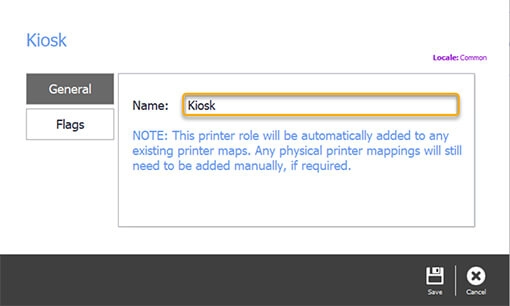
5. When we need to add a new printer role, we simply press the add button on the right, where we add the name of the new printer role: Kiosk.
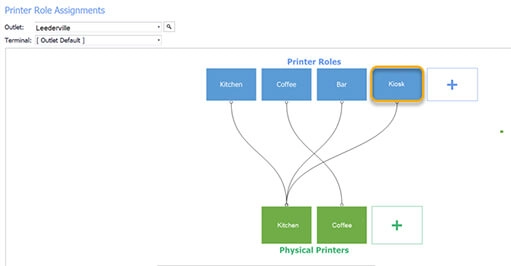
6. We then hit save in the Control Panel, we will be redirected to the Printer Role Assignments window, where we will be able to see our new printer role.


Connect & Disconnect Printer Roles from Physical Printers
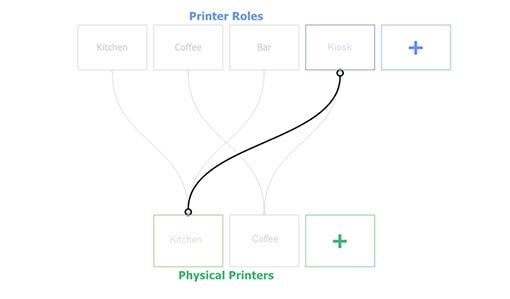
1. To connect the new printer role to the printer, we simply click on the Kiosk printer role to select it and then drag it to the Kitchen printer to make the connection.
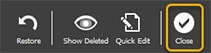
2. We will then press save to save our settings and close, which will redirect us back to the Printer Roles Assignment window.


3. Next, we hit save and close again, to close the System Module, and redirect us back to the Management Console.


Move a Printer Role to a New Printer
1. If we need to move a printer role to a new printer, we go back into settings, outlets, then printers and hit the Printer Role Mappings button to open the Printer Role Assignment window.
2. We then click on the printer role we want to adjust, in our case Kiosk, and drag it to the new physical printer, in our case the Coffee printer, to make the connection.
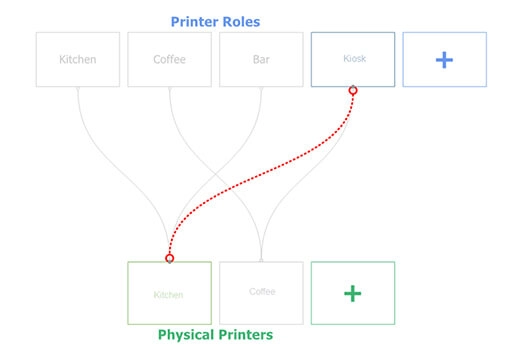
3. Next, we must delete the link connecting the Kiosk role to the Kitchen printer. To do this, we will click on the link select it, and hit delete on the Control Panel, or hit delete on our keyboard. This ensures no error messages will occur in future when printing dockets.

4. This will then show our deleted link as a red dotted line, allowing us to know exactly what we deleted.
5. We will then press save to save our settings and close, which will redirect us back to the Printer Roles Assignment window.

6. Next, we hit save and close again, to close the System Module, and redirect us back to the Management Console.


Publish Printer Role Settings to the POS
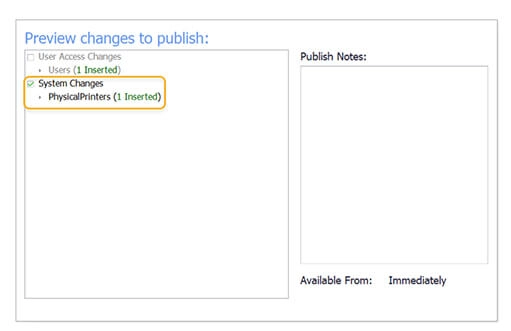
1. Back in the Management Console, we can see that there are new settings ready to publish by the orange notifications on the System tile. So, we click the Publish button, on the top right of the screen.
2. Then we check the changes and outlets we are publishing to, making sure to deselect any changes that we are not ready to publish and outlets we do not want to publish to, and hit publish.

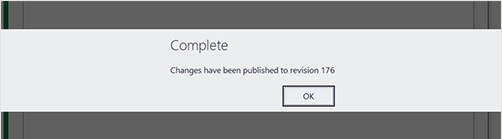
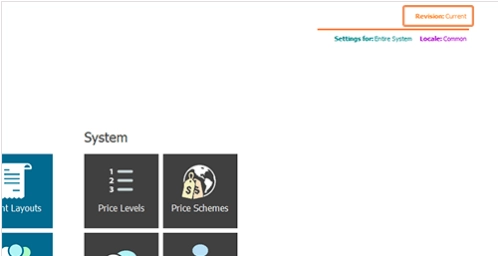
3. Once our changes are published, we receive the Complete message with a revision number which we can use to manage revisions in the Revision Management Tool accessible top right of the screen replacing the Publish button.
Download the Mapping PLUs to Printers Guide
Still got questions?
Just drop us an email or call us on 1300 784 276.