

Kym Eaton
Posted on 3rd July 2023
PowerEPOS provides even more flexibility and revenue-generating opportunities by enabling deposits to be taken and redeemed through the POS. Whether it’s to secure a table booking, or for events such as a quiz night or wedding, the deposits feature will help you increase revenue and reduce no-shows at your venue.

Learning Areas:
 How to set up deposits in the back office How to take deposits through the POS How to redeem deposits How to manage and update deposits
How to set up deposits in the back office
To set up deposits, we need to configure Payment Types, Users and the Touchscreen Editor.
1. First, we need to add a deposit as a Payment Type, so we open Payment Types from the Home Screen.
2. Then we select Insert (1.) from the toolbar, call it Deposit (2.) then hit Save (3.) and close Payment Types.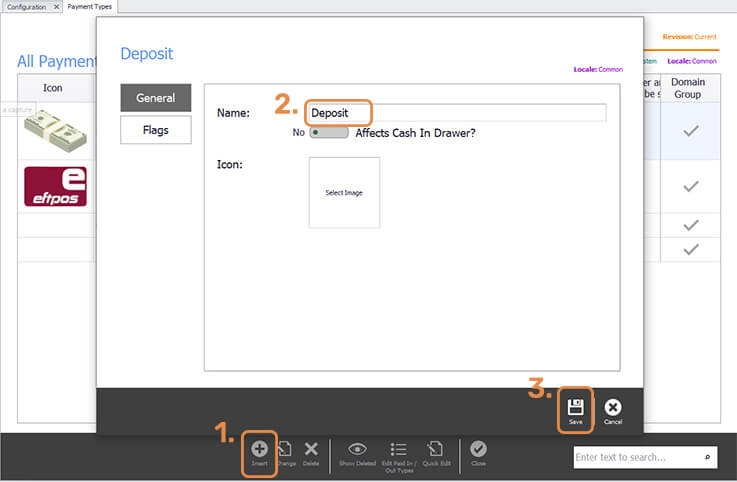
3. Next, we assign the new Payment Type to a group or outlet, so we open System from the Home Screen and double-click on our group, Domain Group. If we wanted to apply it only to an outlet, we just double-click on the outlet.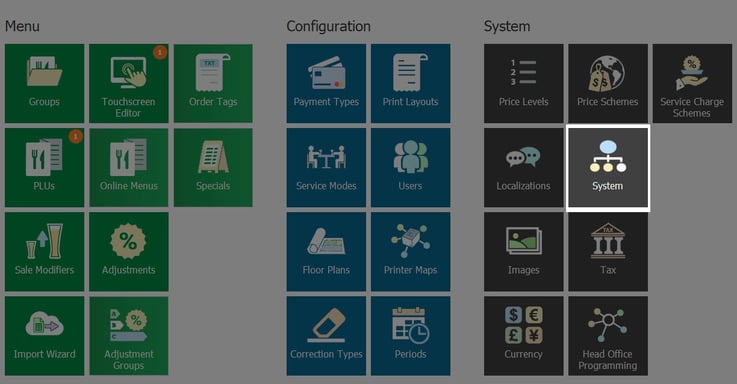
4. Then in Deposit Payment Type we select Deposit (1.) and Save (2.). Then Save and Close the System toolbar.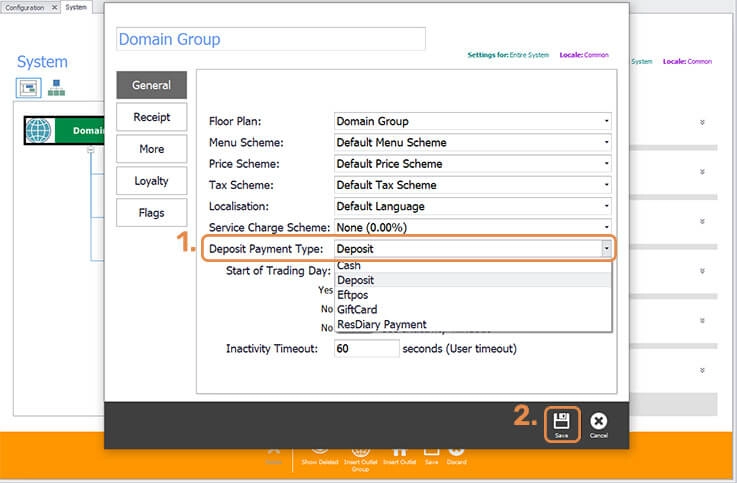
4. Next, we apply permissions to restrict deposit management to specific user types. We open Users, double-click on Manager (1.), click on Flags (2.), check the box for Can manage Deposits (3.) then Save (4.) and close.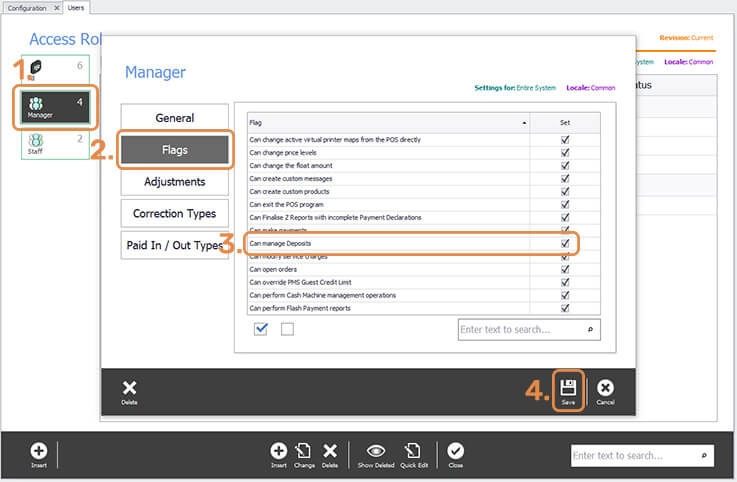
5. Lastly, we need to add Create Deposit and Redeem Deposit buttons to our touchscreen, so we open the Touchscreen Editor.
6. We double-click the Payment Page/Pay Bill Page, then click to select a free button (1.), then in Button Text (2.) we write Create Deposit, in Key Type we select Deposit (Create) (3.) and select a Default Style (4.) to add colour to the button. 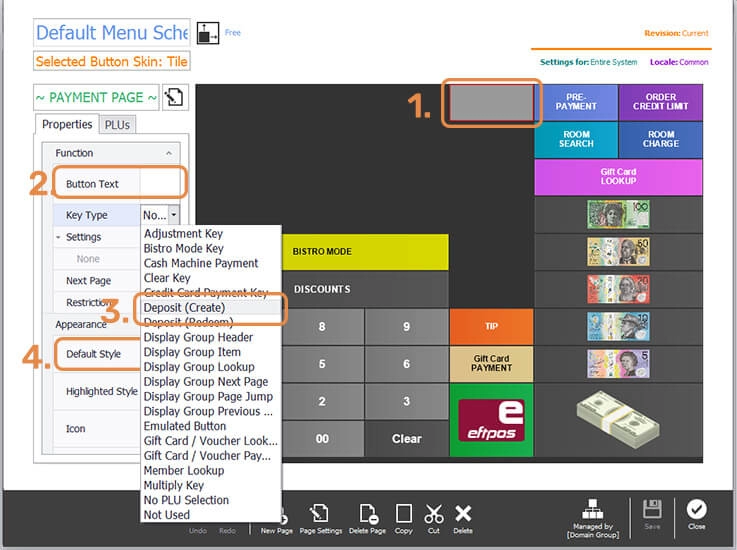
7. Then we do the same again for the Redeem Deposit button but we select Deposit (Redeem) in Key Type and write Redeem Deposit in Button Text.
6. Finally, we hit Apply in the toolbar and Close, then we close the Touchscreen Editor.
7. Now we need to publish our changes, so on the Home Screen we hit Publish, top right of the screen, review our changes, then hit Publish in the toolbar, and select our outlets.
Now Deposit taking is set up and ready to go.
How to take deposits through your POS
Custom Deposits
1. To take a deposit we first open the Order Screen by clicking on a table or through a Quick Sale button like Bar if you have that set up. Then hit the Pay button (1.) which takes us to the Payment Screen and hit the Create Deposit button (2.).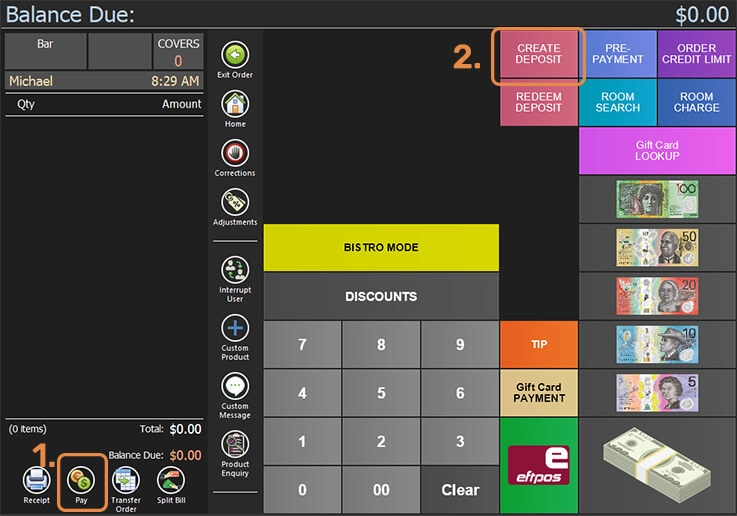
2. Next, we add our deposit amount. We’ll add $50.00 to secure a group booking. This then opens the Create a Deposit window. Now we add the rest of the information. It’s a Custom deposit (1.), the Usage Date is the date the the deposit will be used (2.), the number of people is 10 so I add this to Covers (3.), and the Service Mode is Table (4.). As I have been to the venue before I have requested table 20 so I add this as Entity ID (5.) but remember this is not making a booking, it's just to record the request. Then I add a note about the deposit (6.). To add the guest’s contact details so I know who made the deposit I click Search (7.) and then Create to open the Create a Contact window.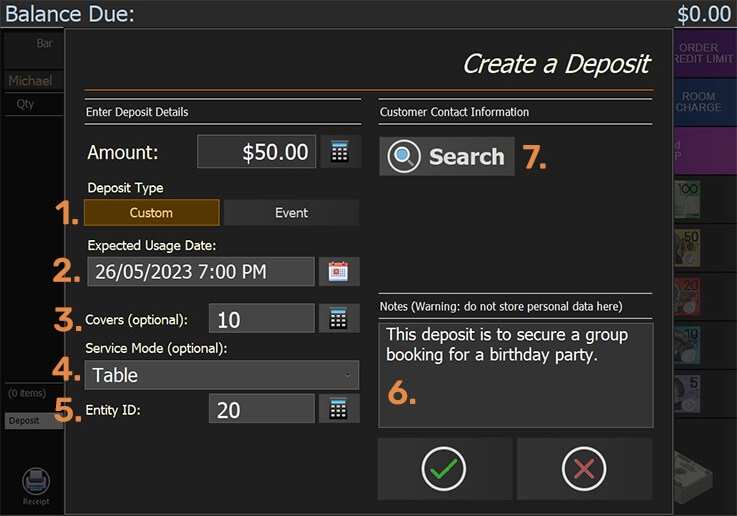
3. Now I add contact details and hit Save and my contact details are saved against the deposit, then I hit Save again to exit the Create a Deposit screen.
4. Finally, we need to take the payment for the deposit and we do this the same as taking any payment. We select our Payment Type, we select cash or card, then our deposit payment is complete.
Event Deposit
The steps for taking an Event deposit are the same as a Custom deposit, aside from creating and applying the event.
1. To do this we follow the Custom deposit steps to get to the Create a Deposit window.
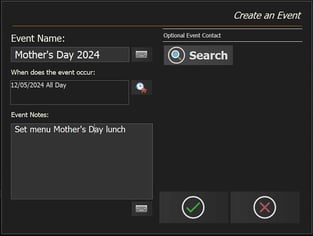
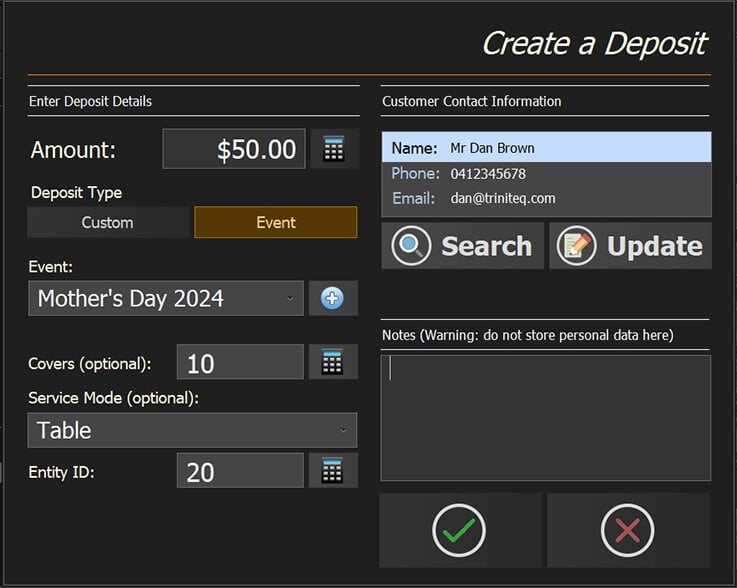
2. In Deposit Type we choose Event which means we can select an event or create a new one. To create an event, we click the ‘+’ and add the details of our event then we save and select the new event for our deposit.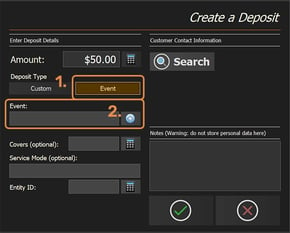

3. Then we follow the rest of steps for Custom Event.
How to redeem deposits through your POS
Deposits can be applied at the start of the order or at the end when the customer pays the bill. The same process is followed doe both situations.
1. To apply the deposit we open the order by selecting the table, hit the Pay button (1.) to get us to the Payment Screen, then Redeem Deposit (2.).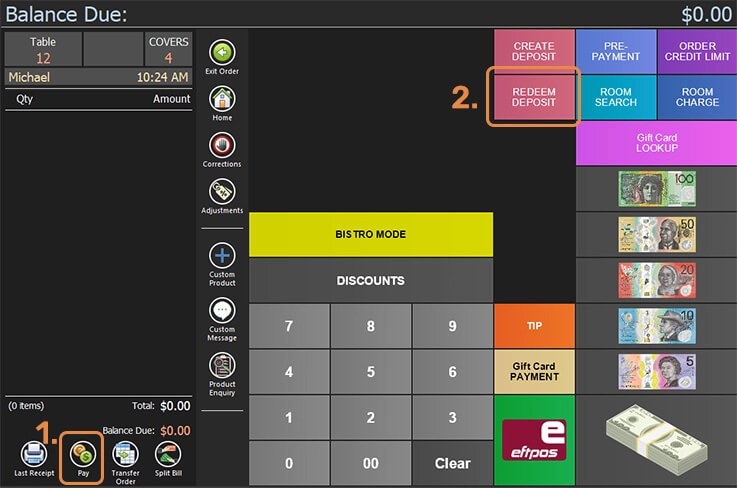
2. Next, we search for the deposit. We can use last name, phone number or email address (1.). Then we highlight the deposit (2.) and hit the green tick (3.), then the green tick again.
3. Now the deposit is applied to the order and as we add food and drinks, these are decremented from the deposit amount (1.).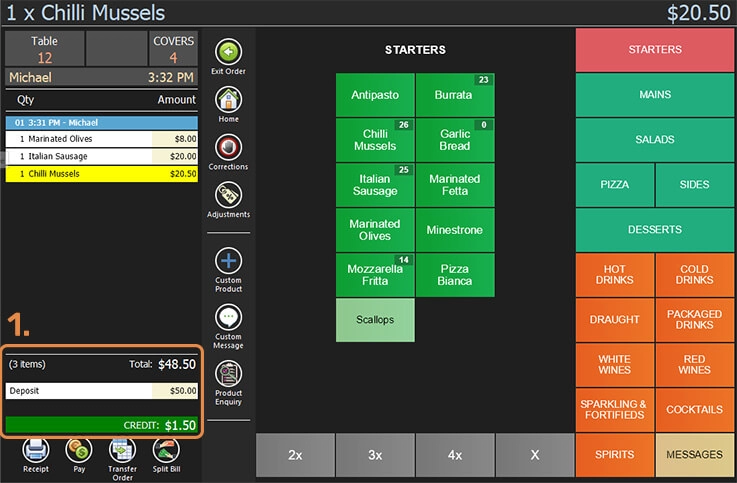
4. To apply the deposit at the end of the order we just take the order, then when the customer is ready to pay we hit Pay and select Redeem Deposit. Then we follow the previous steps.
Note: Deposits can also be taken as payments that are not redeemed for example a deposit for a function.
Accessing & Editing Deposits
1. To search for, view, and edit deposits we find them in Deposits accessed through the PowerEPOS button on the Home Screen. This area can only be accessed by users with a specific permission level.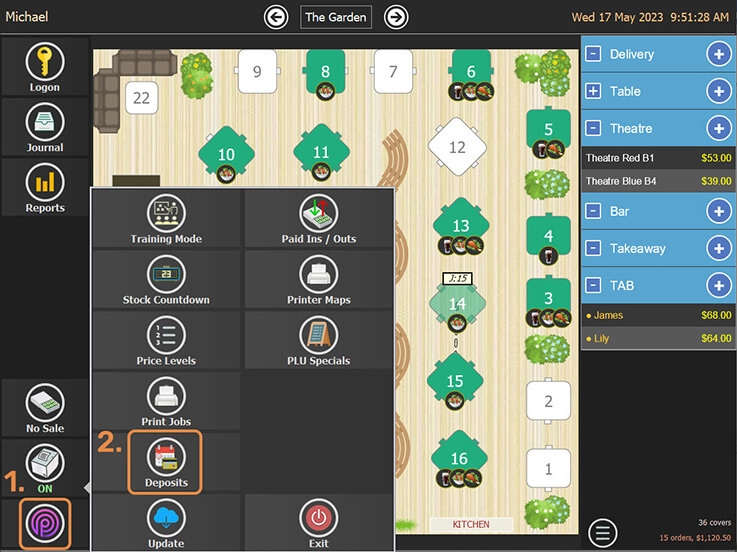
2. Here we can search for and view deposits, update them, and get a list of deposits per event. Important to note is that we can’t change the amount of the deposit as it has already been paid.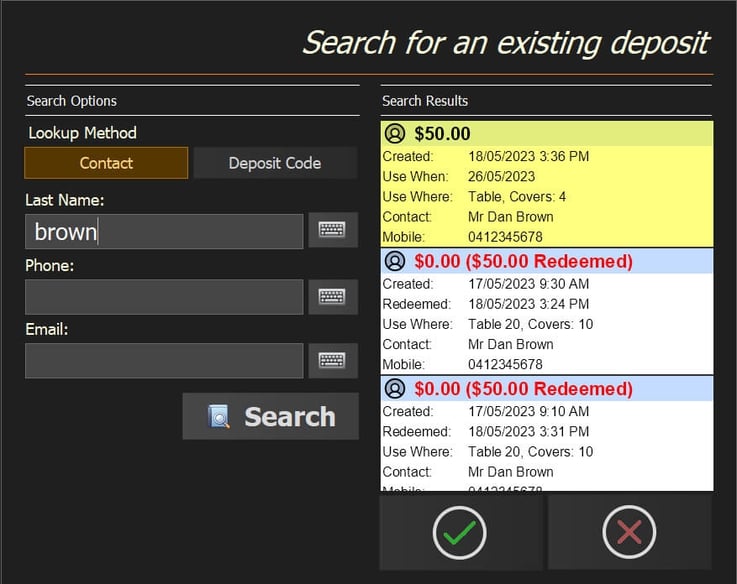
For more information on deposits, please call, 1300 784 276, or email our friendly support team