

Kym Eaton
Posted on 3rd July 2023
Triniteq’s PowerEPOS provides Service Modes to further customise your system to suit your business requirements.
Service Modes offer flexibility by using advanced settings to design your specific service style and production needs, and they are usually based on locations such as table, bar, takeaway or even drive-through. Service Modes are also available for reporting on revenue centres.
Learning areas
 Add a new service mode Configure service mode settings For table service, add table ranges Publish settings to the Point of Sale
Add a New Service Mode
1. To add a new service mode, we slect Service Modes in the PowerEPOS Management Console, which will open the Service Mode Module.
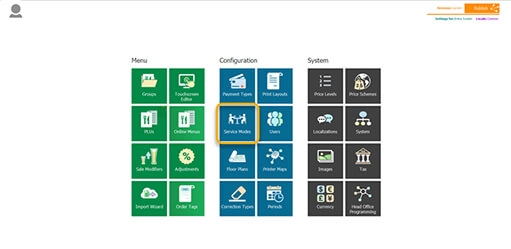

2. We will then hit new on the bottom right-hand side of the control panel, which will open the New Service Mode window.

3. Next, we will enter the name of our service mode. In our example, we have named our service mode table, short for table service.
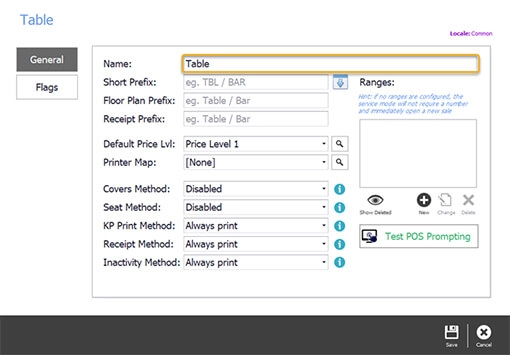
Configure Service Mode Settings
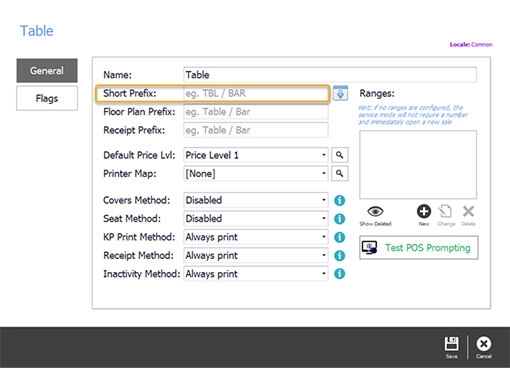
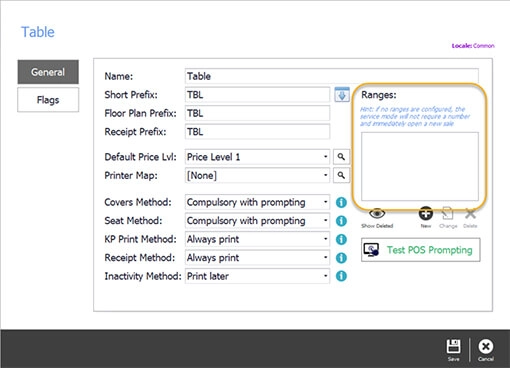
1. We will then input what our service mode will be referred to on different ordering screens. Our short prefix will be displayed on the right-hand side of the ordering screen.
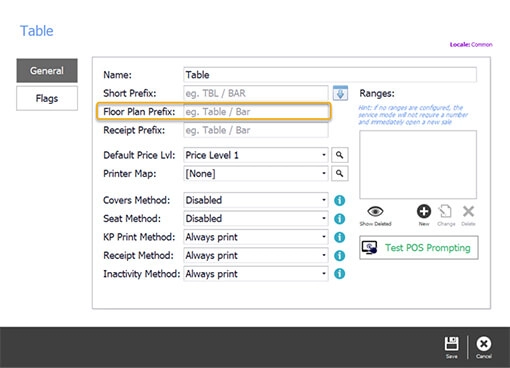
2. Our floor plan prefix is what will be displayed on the floor plan screen,
3. The receipt prefix is what is printed on the receipt or docket.

4. We intend to have the same name for all the prefixes, so we simply input the short prefix, and hit the down arrow on the right-hand side to copy the name to the rest of the prefixes.

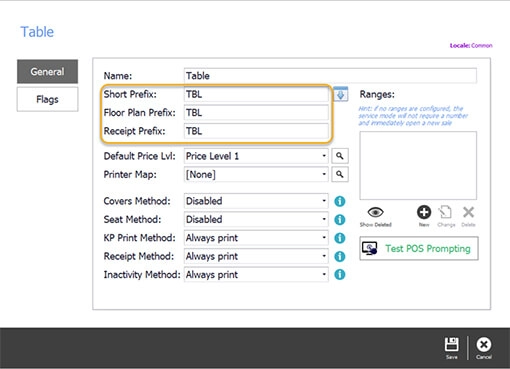
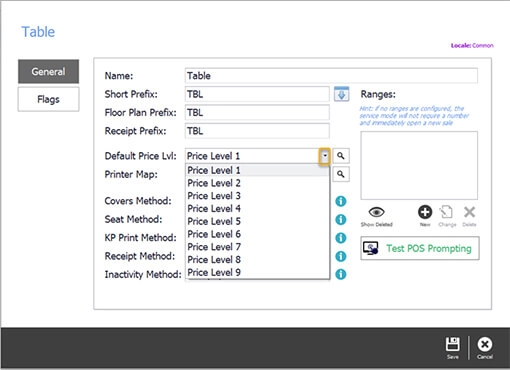
5. We then set up our price level by hitting the drop-down arrow on the right-hand side. This allows us to select the price mode we want to be applied to this service mode. In our example, we have chosen price level 1 for our default price level, referring to dine-in prices.
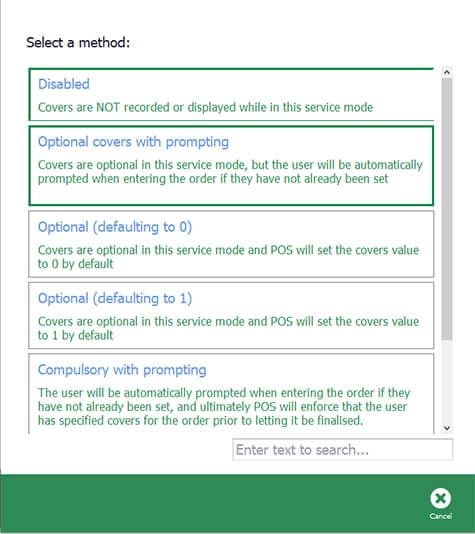
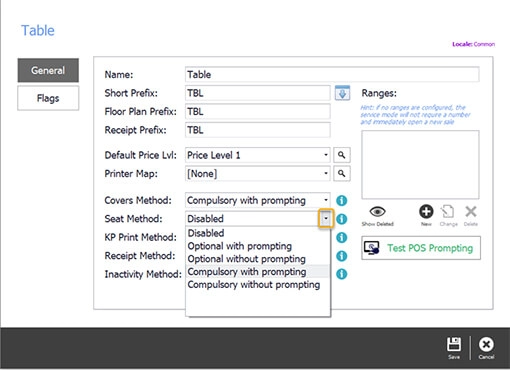
6. We then move on to choosing the methods of our service mode by hitting the drop-down arrow on the right. For covers, we have chosen 'compulsory with prompting' which means that staff will not be able to continue ordering without adding the covers first.
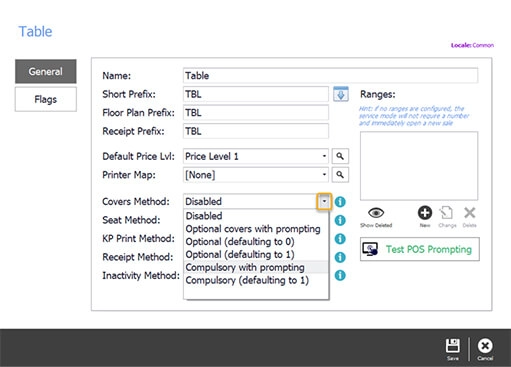
We can learn more about each cover method by hitting the ‘i’ icon on the right.

7. Seat method refers to whether a seat number is required for the order and is added by hitting the drop-down arrow on the right. We have selected 'compulsory with prompting' which means that we need to enter the seat numbers before placing an order.
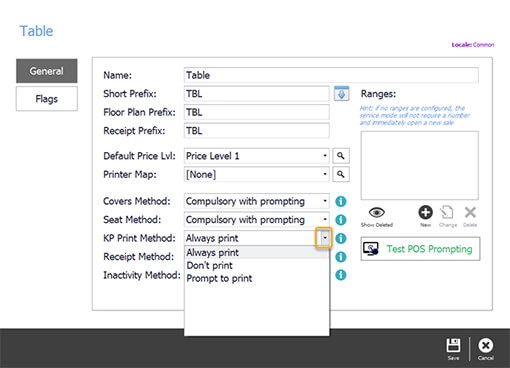
8. The KP Print Method directs the kitchen printer on what to do in certain situations. We can select from our options using the drop-down arrow on the right. We will choose 'always print', which will direct all order dockets to the kitchen printer once complete.
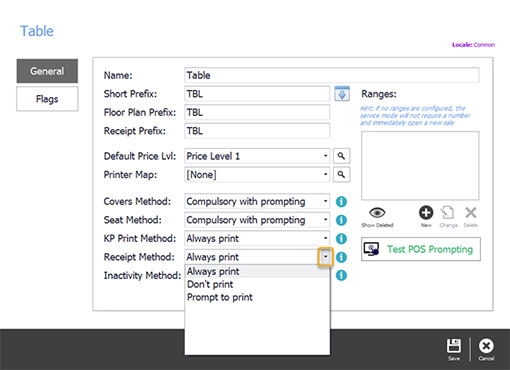
9. The Receipt Method directs how receipts are managed. Some situations do and some do not require receipts to be printed on the completion of an order. In our example for table service, we will select 'always print' as we present a hard copy of the receipt to the table in a folder.
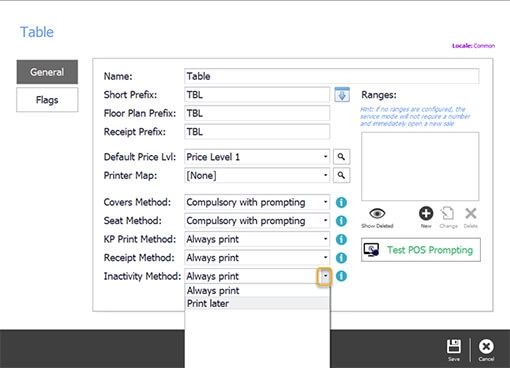
10. Next, we will continue to the Inactivity Method which allows us to control what happens to the order if left inactive for a period of time. In our example, we will select 'print later', as this allows the whole order to be sent to the kitchen at the same time.
Add Table Ranges for Table Service
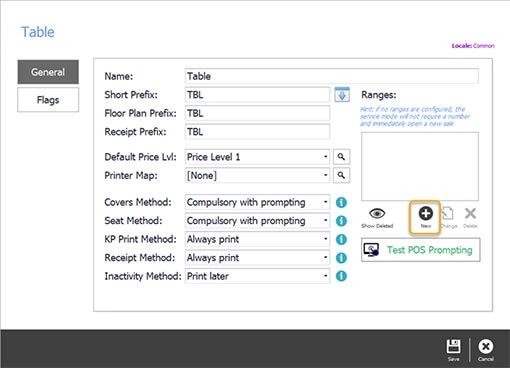
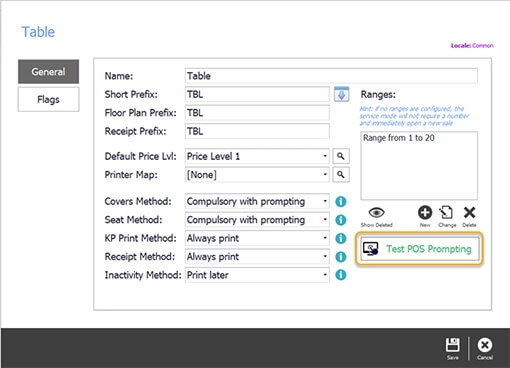
1. On the right-hand side 'Ranges' allow us to input the table numbers for our restaurant.
As our service style is table service, we will hit the 'New' icon below the Ranges input field.
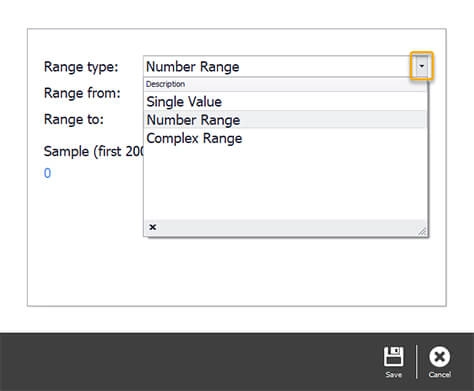
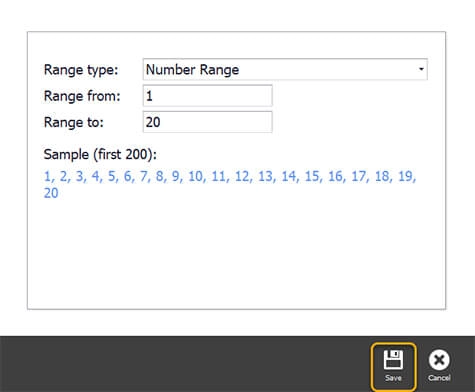
2. This will open the 'Ranges' window in which we can input our range of table numbers and select our range type by hitting the drop-down arrow on the right. As we are using table numbers, we will hit 'Number Range'.
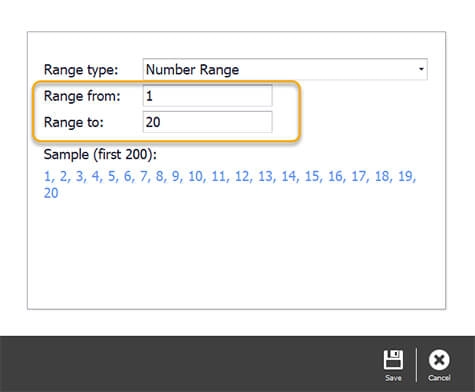
3. We then need to input the number range of our tables. In our example we have 20 tables, so we will input the range being from 1 to 20.
4. We will then hit save on the bottom right-hand side of the window to save our number range, where we will then be redirected to the table window, where we can see our inputted table ranges in the ranges window.
5. We will then hit the Test POS Prompting icon on the bottom of the window, which will allow us to see how our table ranges will look on the POS screen.
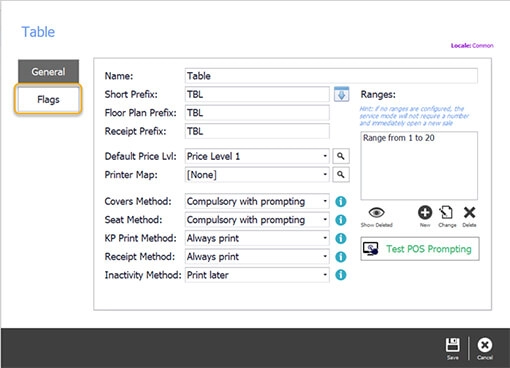
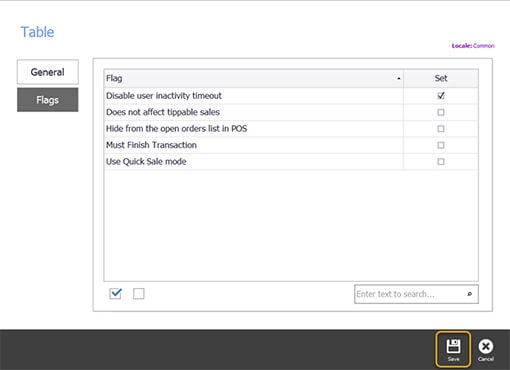
6. On the left-hand side of the Table Window, we will then hit the Flags icon which will open the Flags Window and allow us to set different settings for our service.
7. In our example, we are doing table service, so we will check the box for disable used inactivity timeout on the right-hand side, which ensures our orders are completed before timeout.
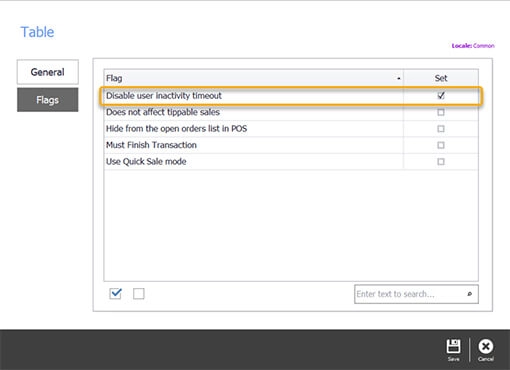
8. We then hit save on the control panel on the right-hand side to save the settings for our service mode, where we will then be redirected to the service modes window.
Publish Settings to the Point of Sale
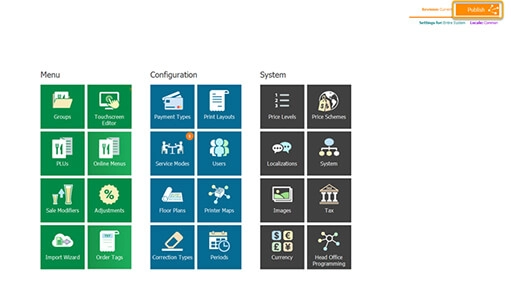
1. Back in the Management Console, we can see that there are new settings ready to publish by the orange notifications on the Service Modes Tile. So, we click the Publish button, on the top right of the screen.
2. Then we check the changes and outlets we publish to, making sure to deselect any changes that we are not ready to publish and outlets we do not want to publish to, and hit publish.

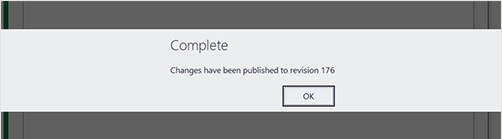
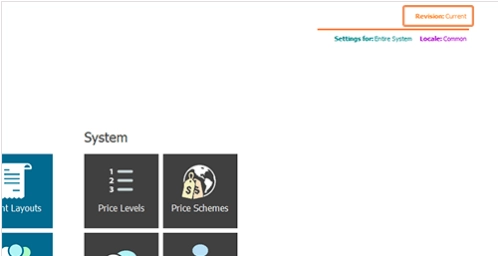
3. Once our changes are published, we receive the Complete message with a revision number which we can use to manage revisions in the Revision Management Tool accessible top right of the screen replacing the Publish button.
Download the Service Modes PDF Guide
Still have questions?
Just submit them to Triniteq Support or call us on 1300 784 276.