

Kym Eaton
Posted on 3rd July 2023
Access Roles are important as they deliver added security to your front-of-house functions.
By allowing only pre-approved users access to certain buttons and functions through Access Roles, you decide who should have access to view, change or process actions such as applying discounts or processing voids and error corrects.
As new users are added to PowerEPOS, we apply an Access Role to their profile which controls how they can use the front-of-house system.
In this guide, you will learn how to set up new Access Roles and edit existing ones. We’ll also cover the permissions and authorisations available to apply to each Access Role and how to send your final settings to your POS terminal, tablet or laptop.
Learning areas:
Set up a new Access Role
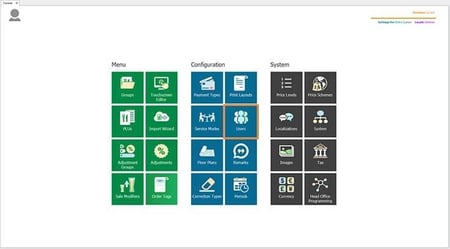
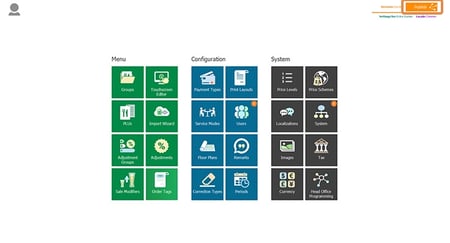
1. From the PowerEPOS Management Console select Users which will open the Users Module.
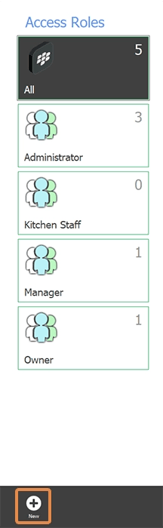
2. Then hit the New button directly beneath Access Roles to open the Access Roles Configuration window.
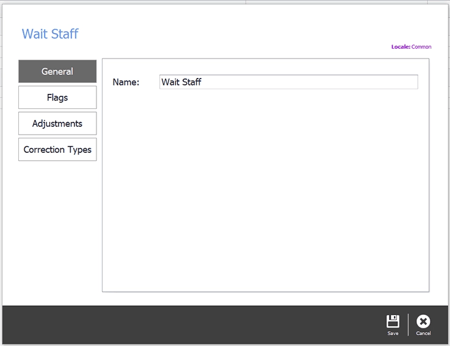
3. Next, add a name for the new Access Role and then click the Flags button.
Configure Access Role settings
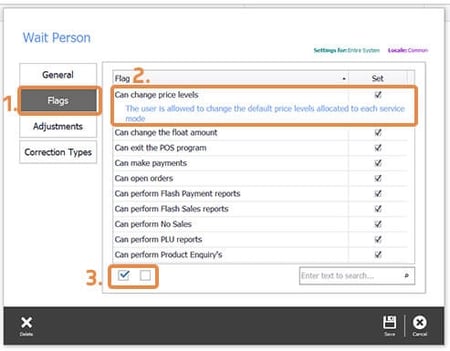
1. Flags provides settings that can be enabled or disabled for each Access Role. For a description of each setting, just click on each Flag (2.). To enable or disable all Flags use the checkboxes below the descriptions (3.)
Set pricing and corrections authorisations
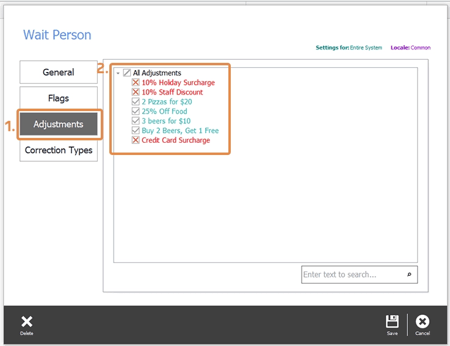
1. Next move to Adjustments. Adjustments allow you to select the discounts and surcharges that this Access Role is allowed to process. As this Access Role is for Wait Person, we will deselect the adjustments that require manager level permissions (2.).
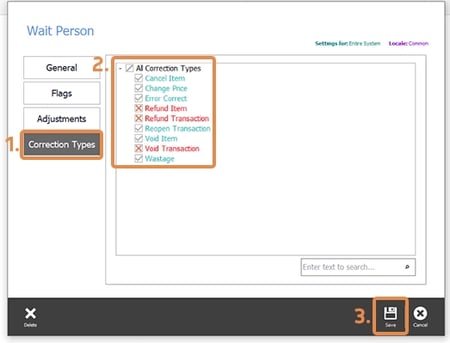
2. Next, we select the Corrections that this Access Role is allowed to process (2.). Then we move down to the control panel and click Save to save these settings and close this window.
Edit existing Access Roles
1. To edit existing Access Roles we double click the Access Role from the left-hand side to open and make it editable. Once it is edited, Save and Close the Access Role.
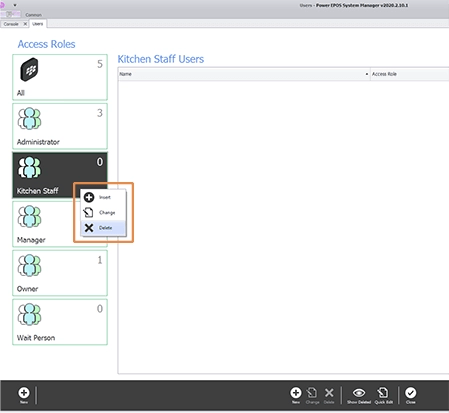
2. To delete an Access Role, we simply right click on the one we wish to delete, then select Delete and Save in the control panel to save the new settings. If the Access Role we wish to delete still has users assigned to it, these will show up in red. We will need to double click on each user and select a new Access Role for each of these users before we can go back and delete the Access Role.
Send Access Role settings to the Point of Sale
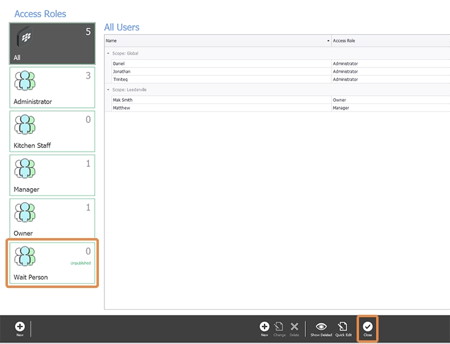
1. Now our new Access Role is set up but unpublished as demonstrated by the unpublished text in the Wait Person Access Role below. So lastly we must publish our settings so they are pushed out and available at the Point of Sale terminal, tablet, laptop or other Windows 10 device.
2. Use the Close button in the control panel to close the Access Roles configuration window.
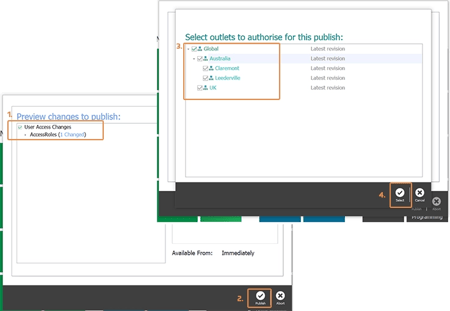
3. Back in the Management Console, we can see that there are new settings ready to publish by the orange notifications on the Users and System tiles. So we click the Publish button, top right of the screen.
4. Then we check the changes and outlets we are publishing to, making sure to deselect any changes that we are not ready to publish and outlets we do not want to publish to.
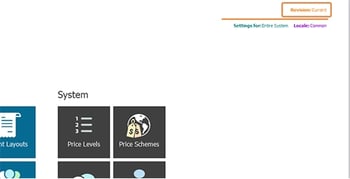
5. Once our changes are published we receive the complete message with a revision number which we can use to manage revisions in the Revision Management Tool accessible top right of the screen replacing the Publish button.

Download the Setting Up Access Roles Guide
Still got questions?
Just submit them to us at Triniteq Support or call us on 1300 784 276.