

Kym Eaton
Posted on 3rd July 2023
-
PowerEPOS puts more control in your hands so you can do more of the setup and configuration of your POS system yourself.
Connecting new printers, routing items to where they are to be printed, and exchanging faulty printers are complicated processes made easy with PowerEPOS.
In this guide we demonstrate how to connect printers so that you can arrange your printer network effortlessly, with just a few button-clicks.
Learning areas: Add a production area or receipt printer Configure printer settings Remove a printer Publish new printer settings to the Point of Sale
Add a production area or receipt printer
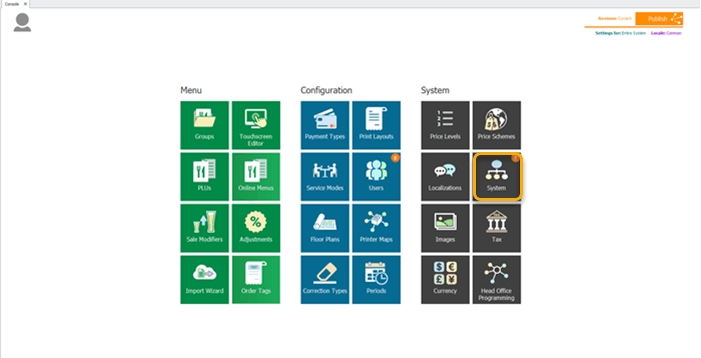
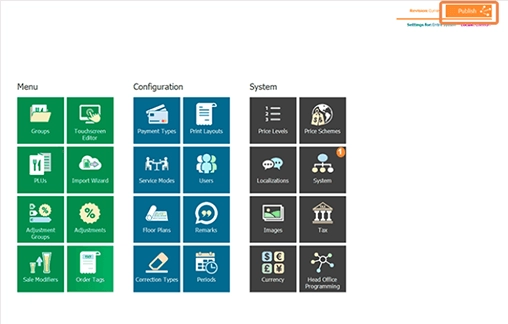
1. From the PowerEPOS Management Console, select the System tile.
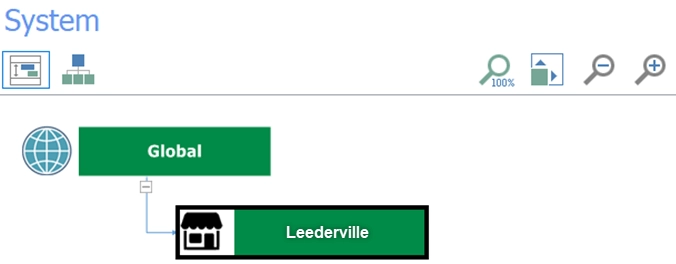
2. This will open the System Module where we have access to the Global Configuration Settings for our system. The outlets on the left-hand side are indicated by a shop icon.
3. In our example, by clicking on the Leederville Outlet on the left-hand side, we can open the settings for the POS Terminals.
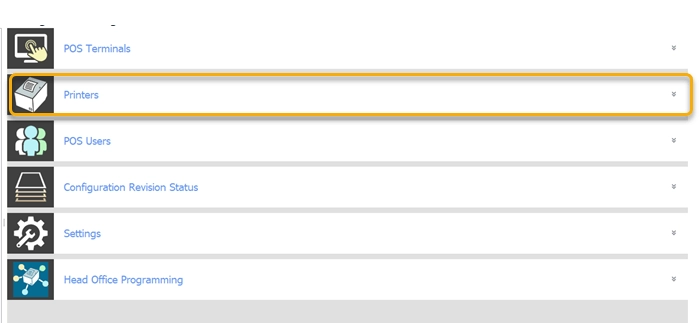
4. From here we will select Printers on the right-hand side from the available settings listed. This will open the Printer Configuration Window which lists printers already set up for the outlet.
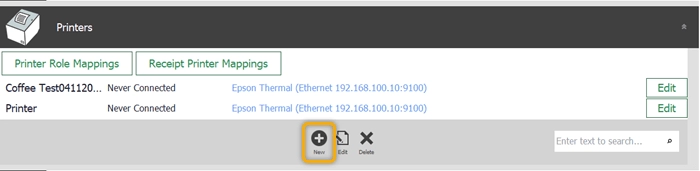
5. On the control panel, click the “New" icon, which will open the New Printer Settings window.
From here we can add a name for the printer to identify the production area (for example coffee or kitchen).
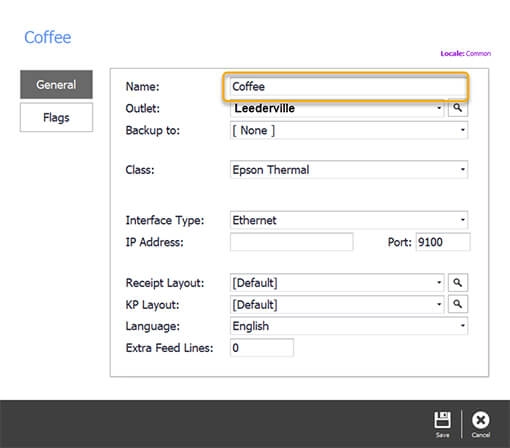
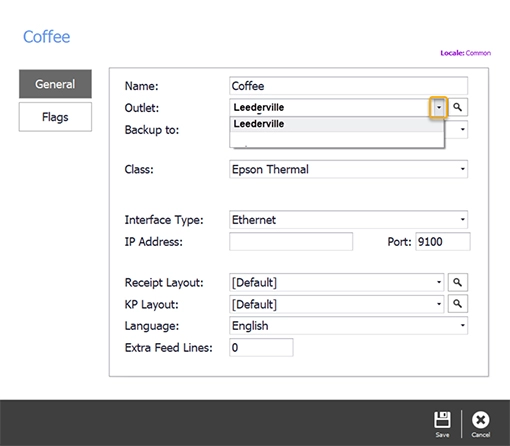
We then ensure the outlet is correct, and if not, we can easily change it by clicking the drop-down arrow.
6. Next, we will select the backup printer, to which the order will redirect should our printer fail.
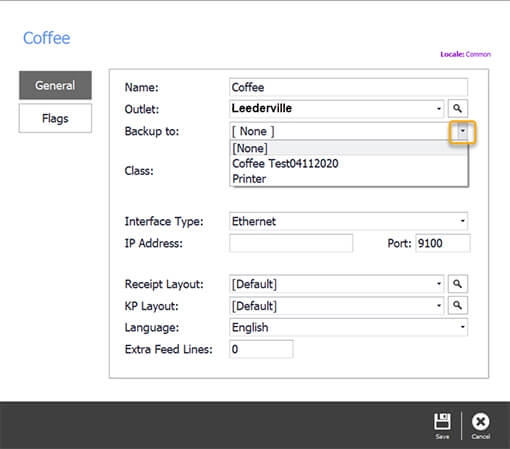
We recommend that the backup printer be located closest to the one being installed, allowing for orders to be quickly diverted to this printer and easily accessible by staff.
7. Now we must select the class or model of printer. In our example, our printer is an Epson Thermal printer which we will select by clicking the drop-down arrow and selecting the relevant printer
Configure printer settings
1. We now need to set up the interface for our printer which determines how the printer will connect to the POS. By clicking the down arrow, you should have two options: Ethernet and Local/Shared.
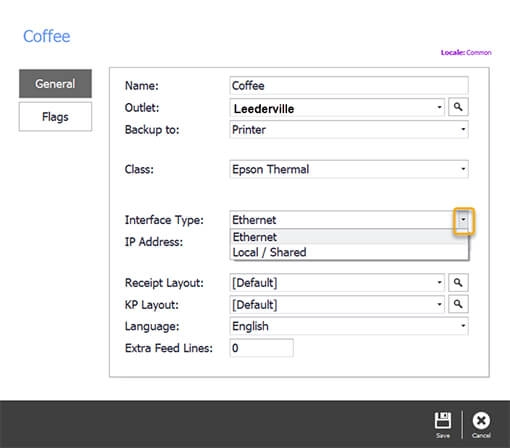
Please Note: Ethernet connects the printer through a Local Area Network, meaning that it is not connected to any one device and allows the printer to be shared between difference devices (such as a tablet or POS Terminal).
Local/shared connects to one device, so even though it can be used by multiple devices, once the tablet or POS Terminal it is directly connected to is turned off, the printer will not work.
2. Next, we will move onto IP address. When purchasing a printer from Triniteq, we can help configure the Printer IP address and post so when the printer is selected from Class, the fields will already be populated with information.
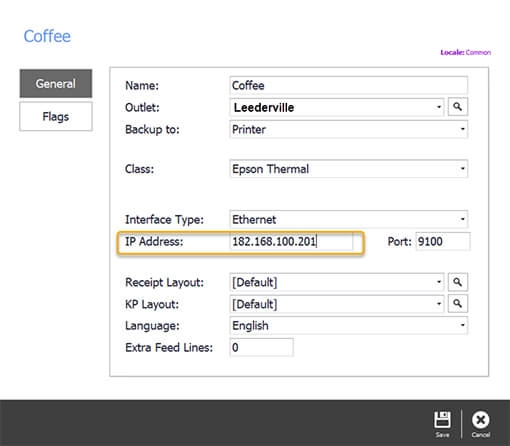
If the printer is already supplied, we will need the printer administrator password to configure the settings.
In both cases, contact our support team at support@triniteq.com if there are any issues with the configuration process.
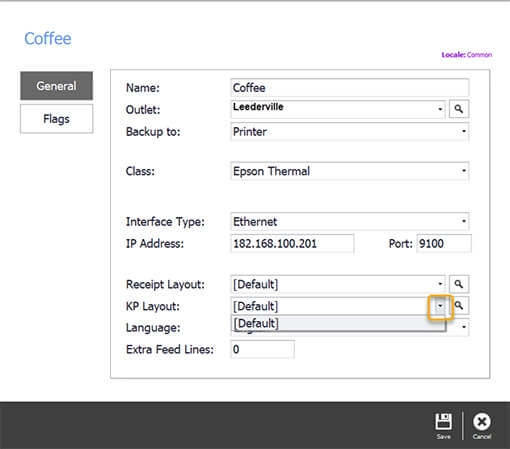
3. Receipt and Kitchen Printer (KP) layouts help to standardise the layout of the content printed on the receipt. For printer set up, we will select the default options for Receipt
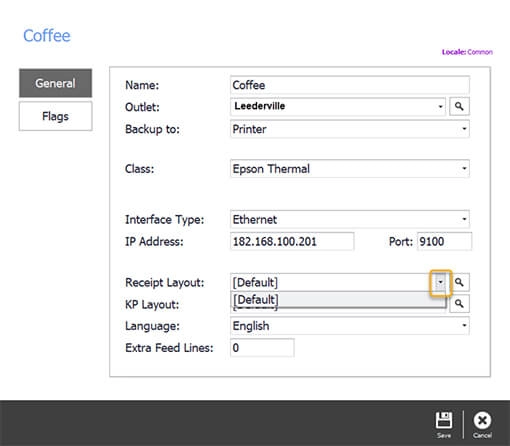
And Kitchen Pinter (KP) receipt layout.
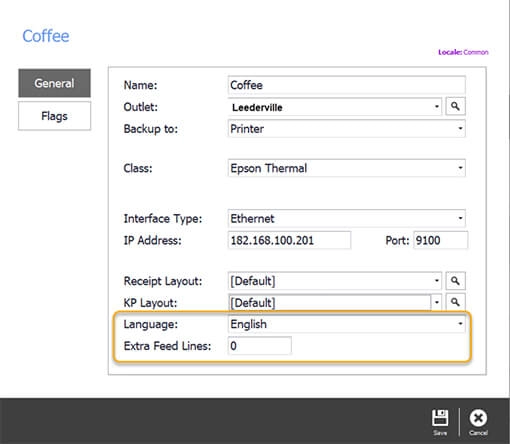
4. Finally, our language is English, and since we do not need extra blank space at the end of our receipt, we will add a 0 to ‘Extra Feed Lines’. If you do need extra space, simply add the number of lines required in this field.
5. We will then press save to save our settings, which will redirect us to the Printers window. From there we can check that our printer has been added or use the “edit” button to go back into printer setup.


Remove a Printer
1. To remove a printer from a store or outlet, we select the printer and in the Control Panel, hit 'Delete'.
Publish new printer settings to the POS
Lastly, we save our Printer settings by clicking the Save button in the Control Panel and then Close the window bringing us back to the Management Console.
- Back in the Management Console, we can see that there are new settings ready to publish by the orange notifications on the System tile. So, we click the Publish button, on the top right of the screen.
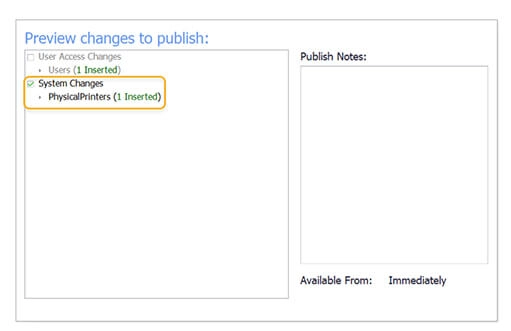
- Then we check the changes and outlets we are publishing to, making sure to deselect any changes that we are not ready to publish and outlets we do not want to publish to, and hit publish.

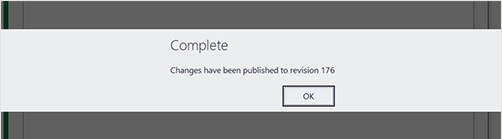
3. Once our changes are published, we receive the Complete message with a revision number which we can use to manage revisions in the Revision Management Tool accessible top right of the screen replacing the Publish button.
Download the Connecting Printers Guide