
Kym Eaton
Posted on 3rd July 2023
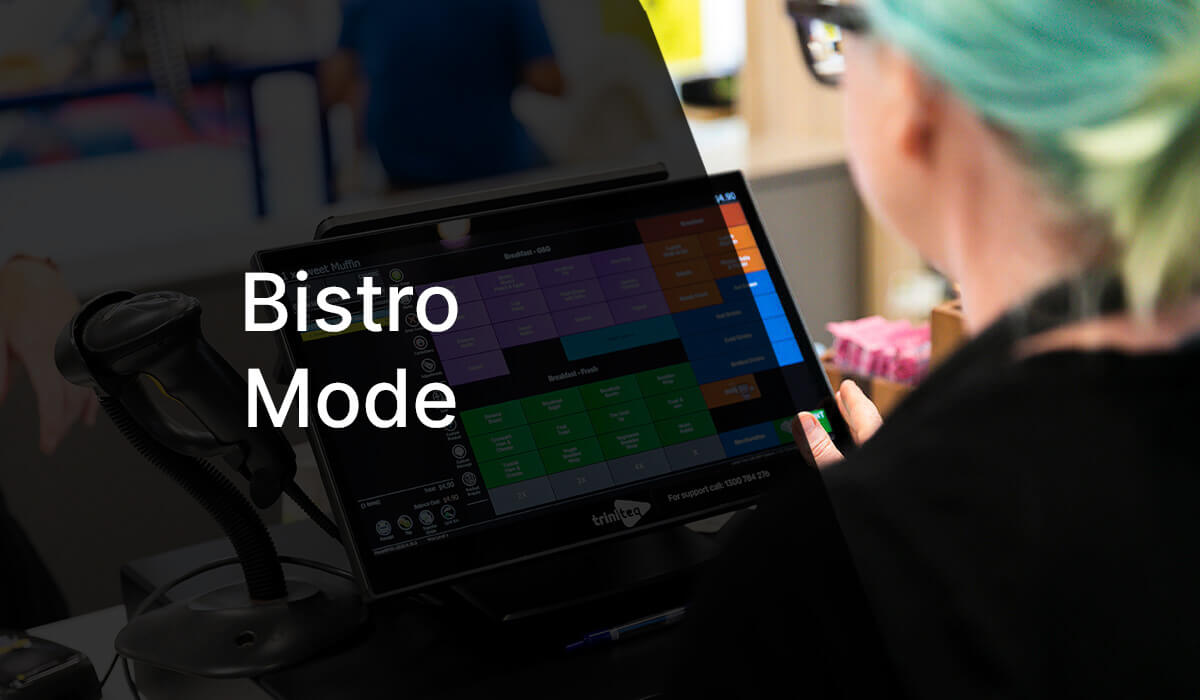
Bistro mode is a way for customers to order and pay for items at the bar or counter. If multiple customers are placing orders for a single table, the user can hold off sending the items to production area printers until all customers have ordered. The orders are then batched so they print on one kitchen or bar docket. It's useful where customers on the same table place and pay for orders individually, then their orders are sent to the kitchen and bar at the same time.
This means that some venues are set up to always take orders in Bistro Mode, for example, at a café providing counter service. Other venues use a button to turn Bistro Mode on and off, for example where food and drink orders are placed at the bar. In this guide we'll run through both situations.
Learning Areas:
 Set up to automatically apply Bistro Mode to all orders Add a Table Number Prompt Through Order Tags Using Always On Bistro Mode on the POS Set Up for Manually Adding Bistro Mode to Orders
![]() Manually place an order in Bistro Mode
Manually place an order in Bistro Mode![]() Put a Bistro Mode order on hold
Put a Bistro Mode order on hold
Automatically Apply Bistro Mode to all orders
Our Café takes all orders from the counter, so we’ll set it up so that Bistro Mode is Always on.
1. To do this we first Open Service Modes from the POS Management screen.
.jpg?width=800&height=493&name=Bistro21%20(1).jpg)
2. We previously set up Counter Service, so we open Counter (1.) and go to Flags (2.). Next, we check Start new POS orders in Bistro Mode automatically and Use Quick Sale mode (3.). Then we Save and exit (4.).

3. Now we move back to the POS Management screen to publish our changes. We click the Publish button, top right of the screen which pushes our changes out to the POS.
This means that all orders will start in Bistro Mode and once each order is completed and sent to production, the order screen automatically resets in Bistro Mode, ready to take the next order.
Add a Table Number Prompt Through Order Tags
In most cases, a table number is required so we know where to deliver the order. This is how we set up a prompt to capture the table number before taking the order.
1. In the POS Management screen open Order Tags.

2. Select Insert, then add the following text to set up table numbers.

3. Next, select Flags and check the boxes of these settings.

4. Lastly, select Service Modes, check Counter Service and Prompt Automatically, then Save.

5. Then close Order Tags and publish the settings. Now when a new order is opened, the POS will ask you for the table number.
Using Always On Bistro Mode on the POS
Now, let’s test always on Bistro Mode in the POS.
1. Let’s start by opening an order Service Modes top right of the screen.

2. Then we are prompted to add a table number.

3. Now we can see that Bistro Mode is active on our order screen, with the table number. So we add our items, then hit the Pay button to take payment.

4. Now the POS asks us if we want to add more people to the order or finalise it and send it to the kitchen. We select Add more.

5. Now we add the order for the next customer from the same table. We can see the first order (1.), the second order (2.), the total thus far for the whole table (3.), the first payment (4.), and the balance due for the 2nd order (5.).

6. Next we select Pay and this time we choose to Print to the kitchen and finalise the order which batches the orders together and sends them to the kitchen to print on one docket.

Set Up for Manually Adding Bistro Mode to Orders
For venues where Bistro mode is not always required, such as when food orders are taken at the bar, we can set it up as a button on our touchscreen where we turn it on and off as needed.
1. We first go to Touchscreen Editor from our POS Management screen.

2. Next, we open our Payment Page.

3. We'll make a big button by highlighting 2 cells, then right click and select Make Large Button. Then, to this button we add the Button Text (1.), the Key Type (2.), and the Default Style (3.).

4. Next we add a Table Number button to record the table number as we take the order. We previously set up table numbers in Order Tags so to add the button to the Payment Screen we select the button then add the Button Text (1.), add the Key Type (2.), Select the Order Tag (3.), and add a style to the button (4.). Then we Save and Close the Touchscreen Editor.

5. Now we move back to the POS Management screen to publish our changes. We click the Publish button, top right of the screen which pushes our changes out to the POS.
Manually place an order in Bistro Mode
Where Bistro Mode orders are intermittent, such as when food orders are taken at the bar, Bistro Mode can be turned on and off as required.
1. First we take the order, then hit the Pay button. Next, we hit the Table Number button and add it. Then we press Bistro Mode. Now the customer pays for their order, and we select Add more people and take the next order.
2. Finally we take the payment for the last order on the table and select Print to the kitchen and finalise order.
3. To turn off Bistro Mode, we just press the same button again.
Put a Bistro Mode Order on Hold
Next, we’ll learn how to put an order on hold. This is useful where a group is fragmented throughout the line or when a customer from a group is not ready to order, so we put the order on hold and serve other customers, then come back to them.
1. To put an order on hold, the setting Must finish transaction, must be unchecked in the back office. To do this, we open Service Modes and the service mode we are using. For our purposes, we open Counter.
2. Next in Flags we uncheck Must finish transaction, then we save, close, and publish the new setting.

3. Now, over in the POS we open the order, go to the payment screen, and add the table number, hit Bistro Mode and take the first couple of orders. Then we select Exit Order.

4. Then we select the bottom option.

5. Now on the home screen we find the order under our Service Mode with a warning that the order is unprinted. When our final customer is ready to order, we simply open and select the pencil icon to edit. Then we add items, take payment, then finalise and send the whole order to the kitchen.

For any questions regarding Bistro Mode, please contact our friendly POS support team on 1300 784 276 or email us.